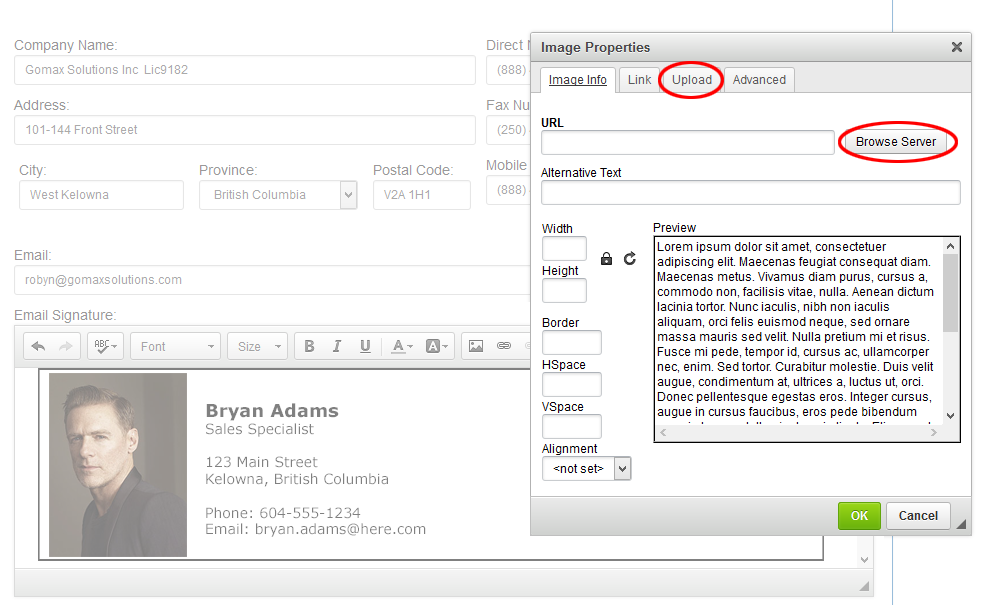
Users can add a custom signature to their outbound marketing by going to Tools > Settings > Profile. This signature can be a graphic or typed text.
Adding a graphic to your Signature
Users can add a custom signature to their outbound marketing by going to Tools > Settings > Profile. This signature can be a graphic or typed text. Scroll down to the middle of the page where you will see ‘Email Signature’. By clicking the icon circled in red (add graphic icon) you will be presented with a popup screen where you can choose to either ‘Upload’ a new image / signature or select an image that has already been uploaded.
Your image should be approx. 580 Pixels in width (height does not matter). Try to upload a graphic that is sized properly before you add it to GoMax. If you upload a graphic that is very large and you scale it down in GoMax, some email programs (Outlook) will render that image back up to it’s original size in your final message.

Add Your Custom Signature with a Placeholder in your Templates
Some templates (action plans) are already set up to use the [Broker_Signature] placeholder, however, some templates may still be using other placeholders to merge with your data (such as broker first and last name, broker company name etc…)
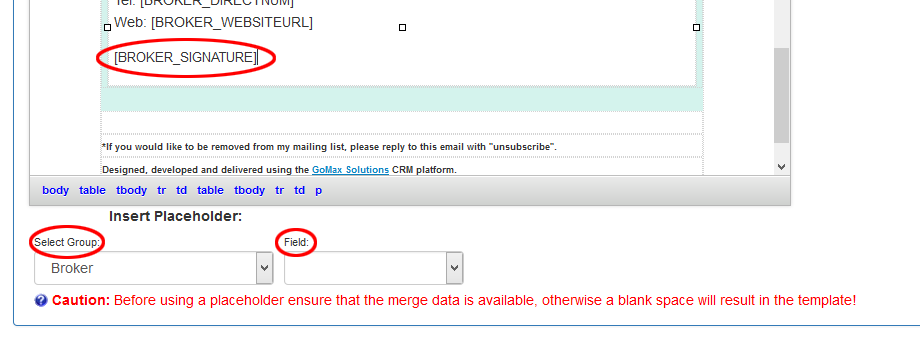
If you wish to use your custom signature, you will need to include/replace the existing placeholders in your outbound inTouch email templates with the “Signature” Placeholder (screenshot below).
To do this, go to your inTouch > Templates and ‘Edit’ the desired template. If the template uses placeholders other than the signature placeholder, simply delete the text with your keyboard. Then with your cursor in place, simply select the placeholder group ‘Broker’ and then the field ‘Signature’. This will add the placeholder to your template and it will merge with the contents of your signature into the template when it is sent out. Don’t forget to Save your changes and send yourself a test email to confirm the look of the template.


